Spring Boot에서 JUnit 으로 Test 해보겠습니다.
먼저 test 패키지에 JUnit Test Case 파일을 만들어 줍니다.
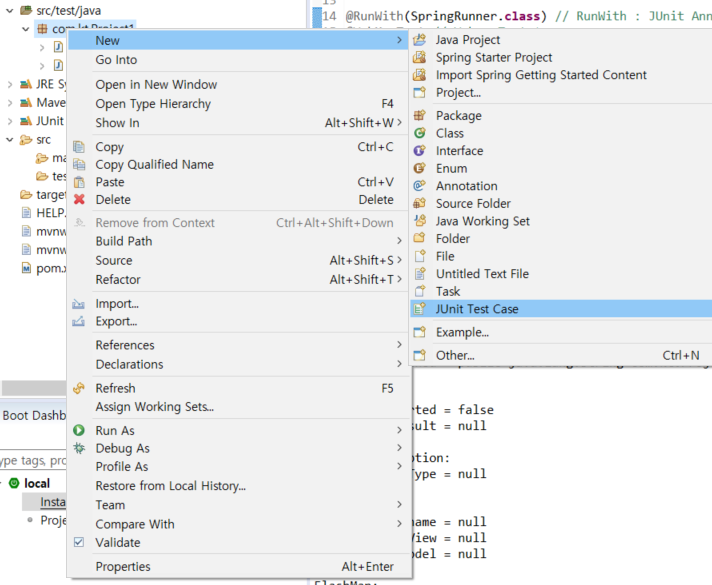
SampleControllerTest .java
|
1
2
3
4
5
6
7
8
9
10
11
12
13
14
15
16
17
18
19
20
21
22
23
24
25
26
27
28
29
30
31
32
|
import static org.springframework.test.web.servlet.request.MockMvcRequestBuilders.get;
import static org.springframework.test.web.servlet.result.MockMvcResultHandlers.print;
import static org.springframework.test.web.servlet.result.MockMvcResultMatchers.status;
import org.junit.Test;
import org.junit.runner.RunWith;
import org.springframework.beans.factory.annotation.Autowired;
import org.springframework.boot.test.autoconfigure.web.servlet.WebMvcTest;
import org.springframework.test.context.junit4.SpringRunner;
import org.springframework.test.web.servlet.MockMvc;
@RunWith(SpringRunner.class)
@WebMvcTest
public class SampleControllerTest {
// MockMvc 를 활용해서 test를 만듬
@Autowired
MockMvc mockMvc;
@Test
public void helloTest() throws Exception{
mockMvc.perform(get("/hello"))
.andDo(print()) // 요청과 결과 출력
.andExpect(status().isOk()) // isOk 가 나오길 기대한다.
;
}
}
|
cs |
@RunWith(SpringRunner.class) // RunWith : JUnit Annotation , SpringRunner : JUnit Test용 Runner
@WebMvcTest // Web쪽만 Test 하겠다는 뜻.
MockMvc를 활용해서 Test를 만들어 봅니다.
JUnit Test 는 public void Method명 순으로 정의를 해줘야 합니다.
먼저 get 요청을 날려봅니다.
.andDo(print()) 로 요청 결과를 출력하고,
.andExpect(status().isOk()) 로 결과값이 isOk 가 반환되기를 기대해 봅니다.

테스트를 실행하고 나면 결과가 아래와 같이 나옵니다.
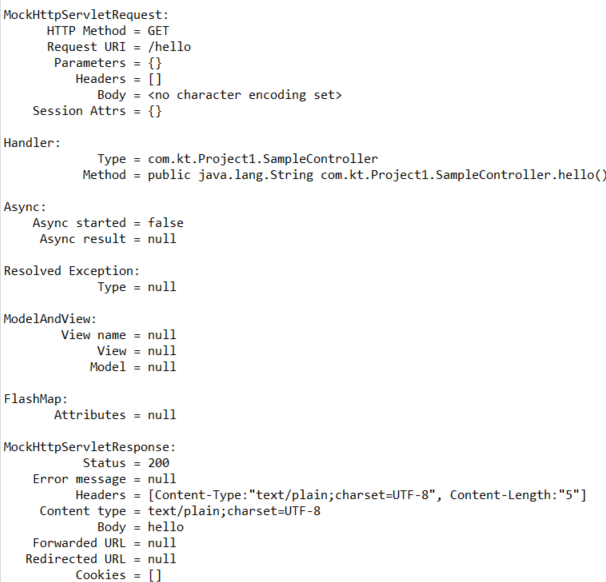
MockHttpServletRequest
Method : GET
URI : hello
status 는 200 (OK) 가 나온것을 확인할 수 있습니다.
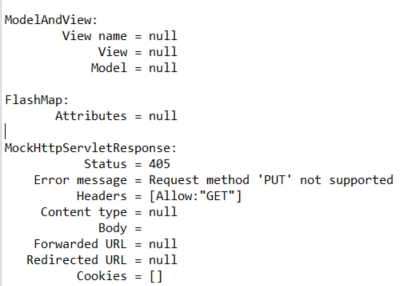
get 대신에 post, delete, put도 사용할 수 있습니다.
이 메소드를 get만 허용하고 싶다면, Controller에서 Request를 정의할때, GET 메소드를 적어주면 됩니다.
SampleController.java
|
1
2
3
4
5
6
7
8
9
10
11
12
13
14
15
|
import org.springframework.stereotype.Controller;
import org.springframework.web.bind.annotation.RequestMapping;
import org.springframework.web.bind.annotation.RequestMethod;
import org.springframework.web.bind.annotation.ResponseBody;
@Controller
public class SampleController {
@RequestMapping(value="/hello", method=RequestMethod.GET)
@ResponseBody
public String hello() {
return "hello";
}
}
|
cs |
이렇게 정의한 경우 put등을 날리면 MethodNotAllowed (Code 405) 가 Return 됩니다.
get과 put 둘다 허용하고 싶을 경우에는

배열로 둘다 허용해주면 됩니다.
HTTP Method
GET 요청 :
Client가 서버의 리소스를 요청할 때 사용
캐시 처리 가능( 동일한 요청을 보낼때, 조건에 따라 Body를 보내지 않아도 캐시에 있는 정보를 보내줘 요청이 빠르게 처리됨, 하지만 민감한 정보는 다 보이기 때문에 처리할 때 조심해야함)
POST 요청 :
리소스를 새로 만들거나 요청할 때 사용.
같은 요청을 보내도 다른 결과가 올 수 있음
URI는 하나의 리소스를 지칭하는 것이 아니라, post에 실어 보내는 데이터를 처리하는 리소스임
PUT 요청 :
URI 는 하나의 리소스를 지칭하므로 같은 요청에 대해 결과가 항상 같음
PATCH 요청 :
PUT 과 비슷하나 기존 엔티티와의 차이점만 리턴함
기존의 데이터를 수정하고 싶을 때 사용
DELETE 요청 :
삭제할 때 사용
추가 1.
@RequestMapping(value="/hello", method= RequestMethod.GET)
는 아래와 같이 줄여서 사용할 수 있음
@GetMapping("/hello")
추가 2.
Controller 에 @RequestMapping(method= RequestMethod.GET)
어노테이션을 달면 컨트롤러는 GET Reuqest만 처리한다는 뜻임
추가 3.
URI, URL, URN 차이?
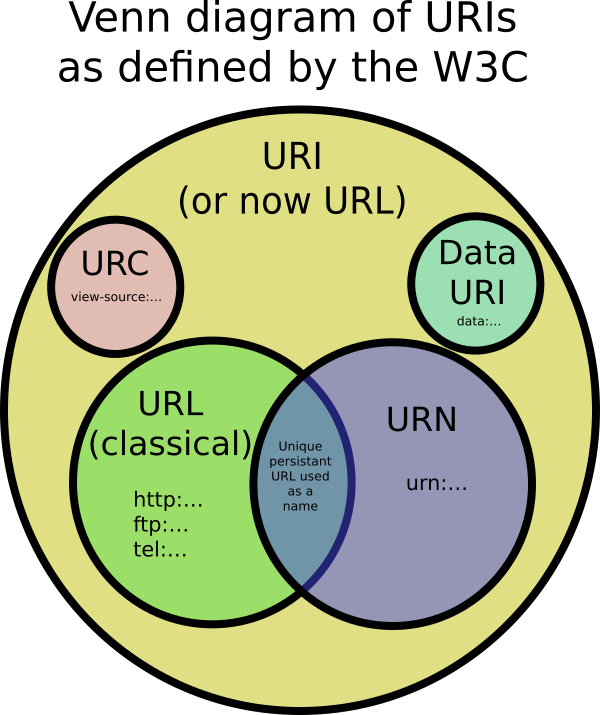
URI 가 가장 큰 개념입니다.
URL은 Location을 나타내고
URN은 Name을 나타냅니다.
Reference
Inflearn 스프링 웹 MVC
'Back-end > Spring' 카테고리의 다른 글
| HttpClientException 401 Unauthorized (0) | 2021.07.12 |
|---|---|
| 스프링 공부 (0) | 2019.06.11 |
| Spring Framework 실행순서 (1) | 2019.03.22 |
| Received fatal alert: protocol_version -> [Help 1] 에러해결 (0) | 2019.03.21 |
| Mybatis 연동하기 (0) | 2019.03.04 |

